# Creating an Animation Rig and Multi-Aim Constraint
## Creating an Animation Rig
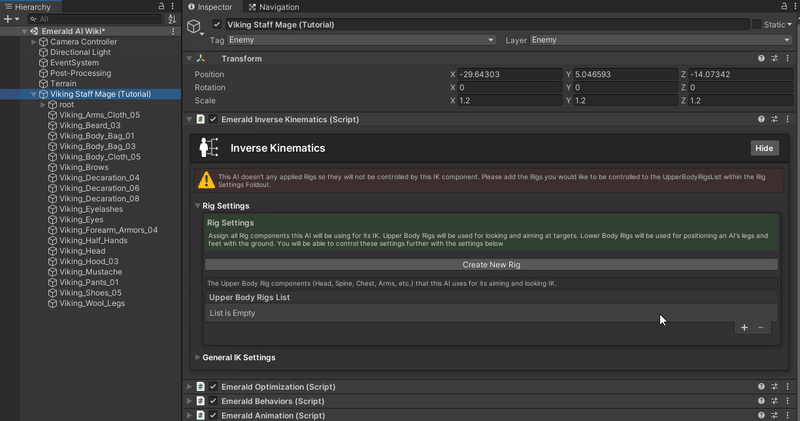
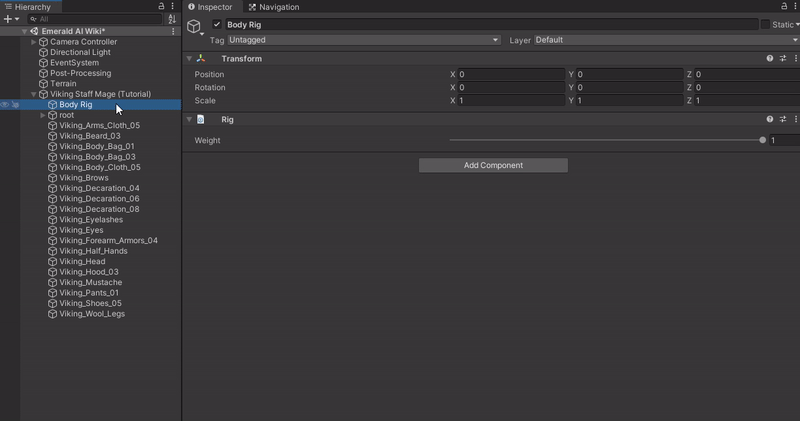
The first time the IK Component is added to an AI, there will be a warning message at the top of the IK component. Users can create an Animation Rig by pressing the Create New Rig button. This will automatically create a new rig object and parent it to your AI. You should then assign a name for the newly created rig. This rig will automatically be added to the Upper Body Rigs List of the IK Component.
## Creating a Multi-Aim Constraint
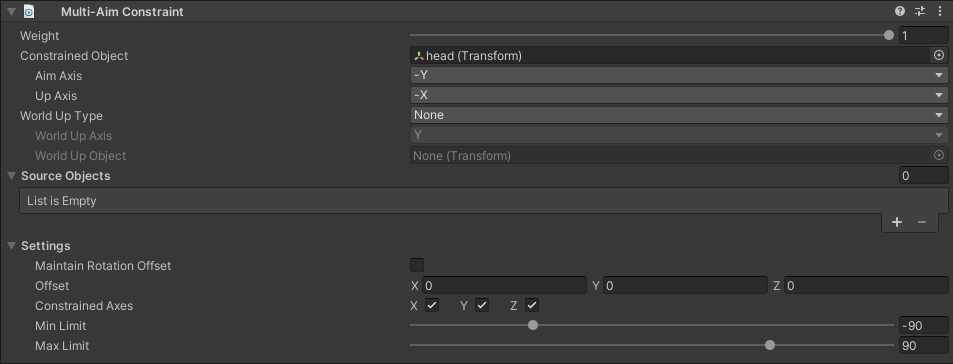
You will need to create and name a new GameObject in the newly create Rig object. This object will be used to control the attached bone transform that the IK Component will use. Assign a [Multi-Aim Constraint Component](https://docs.unity3d.com/Packages/com.unity.animation.rigging@1.1/manual/constraints/MultiAimConstraint.html) to this object.
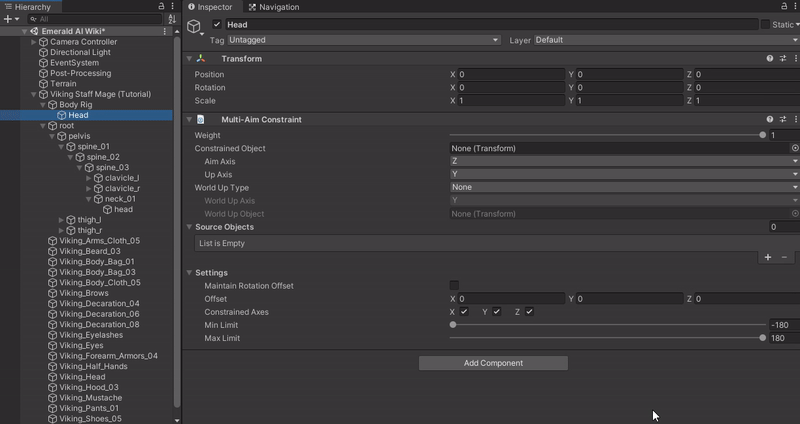
Have the Multi-Aim Constraint object that was just created selected. It is recommended that the Min and Max Limits are set to 90. Assign your bone transform to the Constrained Object slot.
{% hint style="info" %}
**Note:** Adjust the Weight to your preference. Keep in mind that if this is too high, it can mask an AI's animations. Start with a value between 0.25 and 0.5 first then increase it if you need to.
{% endhint %}
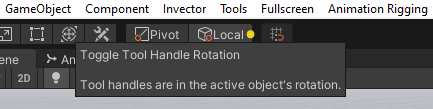
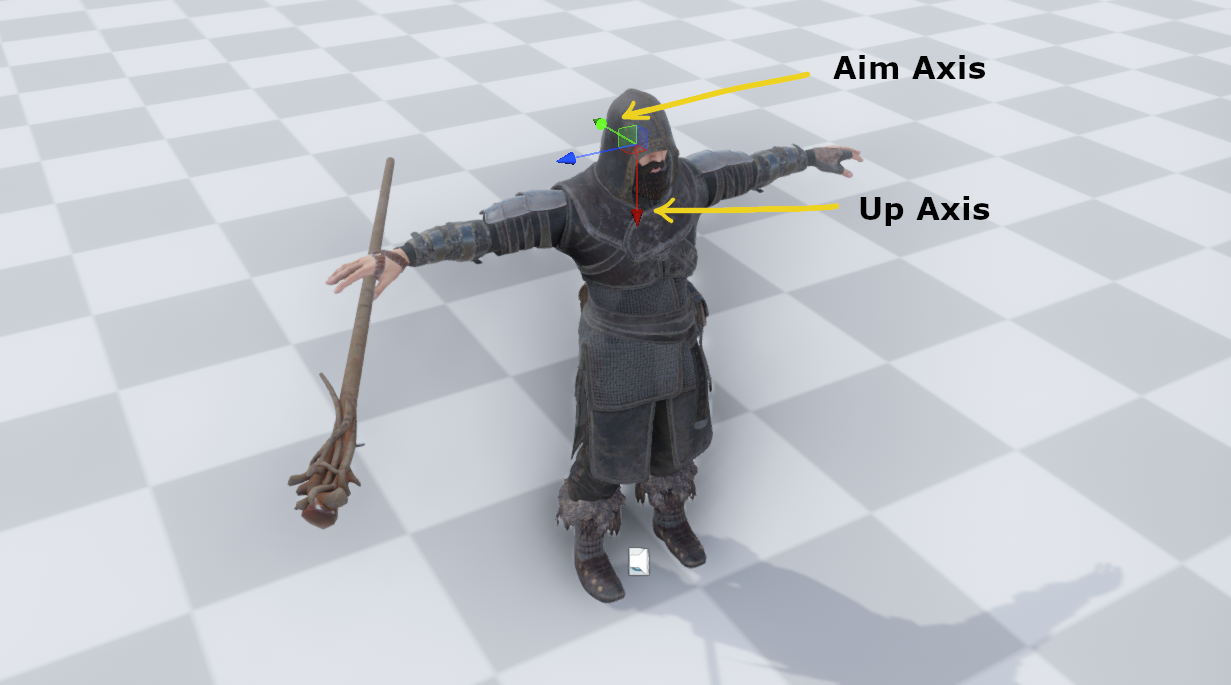
Your assigned bone transform on the Multi-Aim Constrain needs to have its Aim Axis and Up Axis assigned. These are based on the local directions of your assigned bone transform. Ensure Unity's Tool Handle is set to Local.
Using the reference below, assign your Aim Axis and Up Axis to the Multi-Aim Constrain.
For this AI's Head, it has its Aim Axis at -Y and the Up Axis is -X so you would then assign these to the Head Multi-Aim Constraint. You base its local directions to that of the global directions within Unity.
{% hint style="info" %}
**Note:** Every AI's bone transforms are different and vary based on models and publisher sources.
{% endhint %}
{% hint style="info" %}
**Note:** It is recommended you leave the rest of the settings alone as some can inhibit the AI from being able to properly use the IK feature.
{% endhint %}
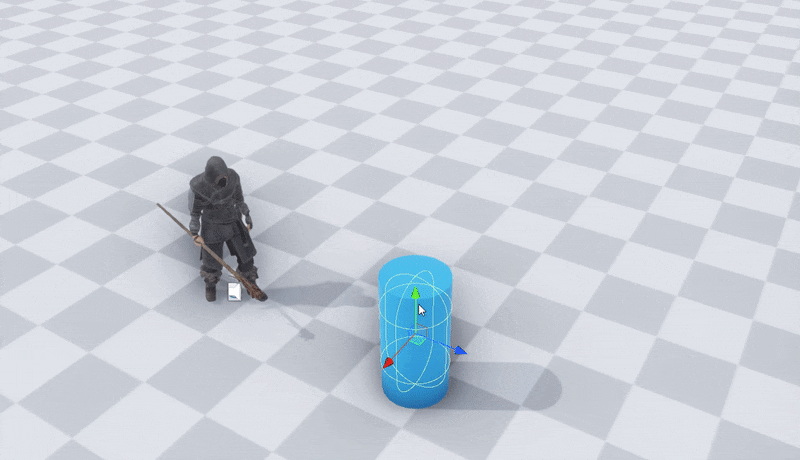
After you have finished this set up, your AI should be able to look at its Combat and Look At Targets. The below example is an AI looking at a Friendly player target. The Source Object is automatically managed by the IK Component.
{% hint style="info" %}
**Note:** You will need to do this for each transform bone you would like to use the IK feature. Multiple Multi-Aim Constraint can be assigned to a rig, if needed. You can repeat these steps with an AI's spine bone transform for an AI's body IK, if needed.
{% endhint %}